
What you will need:
The Nintendo GameCube was a rather impressive piece of hardware in its heyday. It has a number of connectivity options for fans of the Game Boy Advance & early models even had a digital output for enhanced video fidelity, which was rather unusual for the time.
Indeed, the GC was one of the few times Nintendo opted to compete with Sony & Microsoft in sheer graphics capability. Unfortunately this backfired and the console was a commercial failure for Nintendo.
Although the GC is not quite as popular as its predecessor, there are still quite a number of mods that can be done to it. The easiest of these is the drive chip - a 6 point install that doesn't even require wires.
Xeno GC Install


The first step for this install is the almost complete disassembly of the GC case using our trusty gamebit. Unfortunately, this means screws. A lot of screws. I don't know what it is about this console but it seems like Nintendo might have a record for how many screws they can fit inside of such a small case. Its even worse than the N64.
After removing the screws near the fan housing/controller ports & lifting off the DVD drive, there is a metal shield that must be removed. Once this is done we can see the CN302 area that our chip gets soldered to.
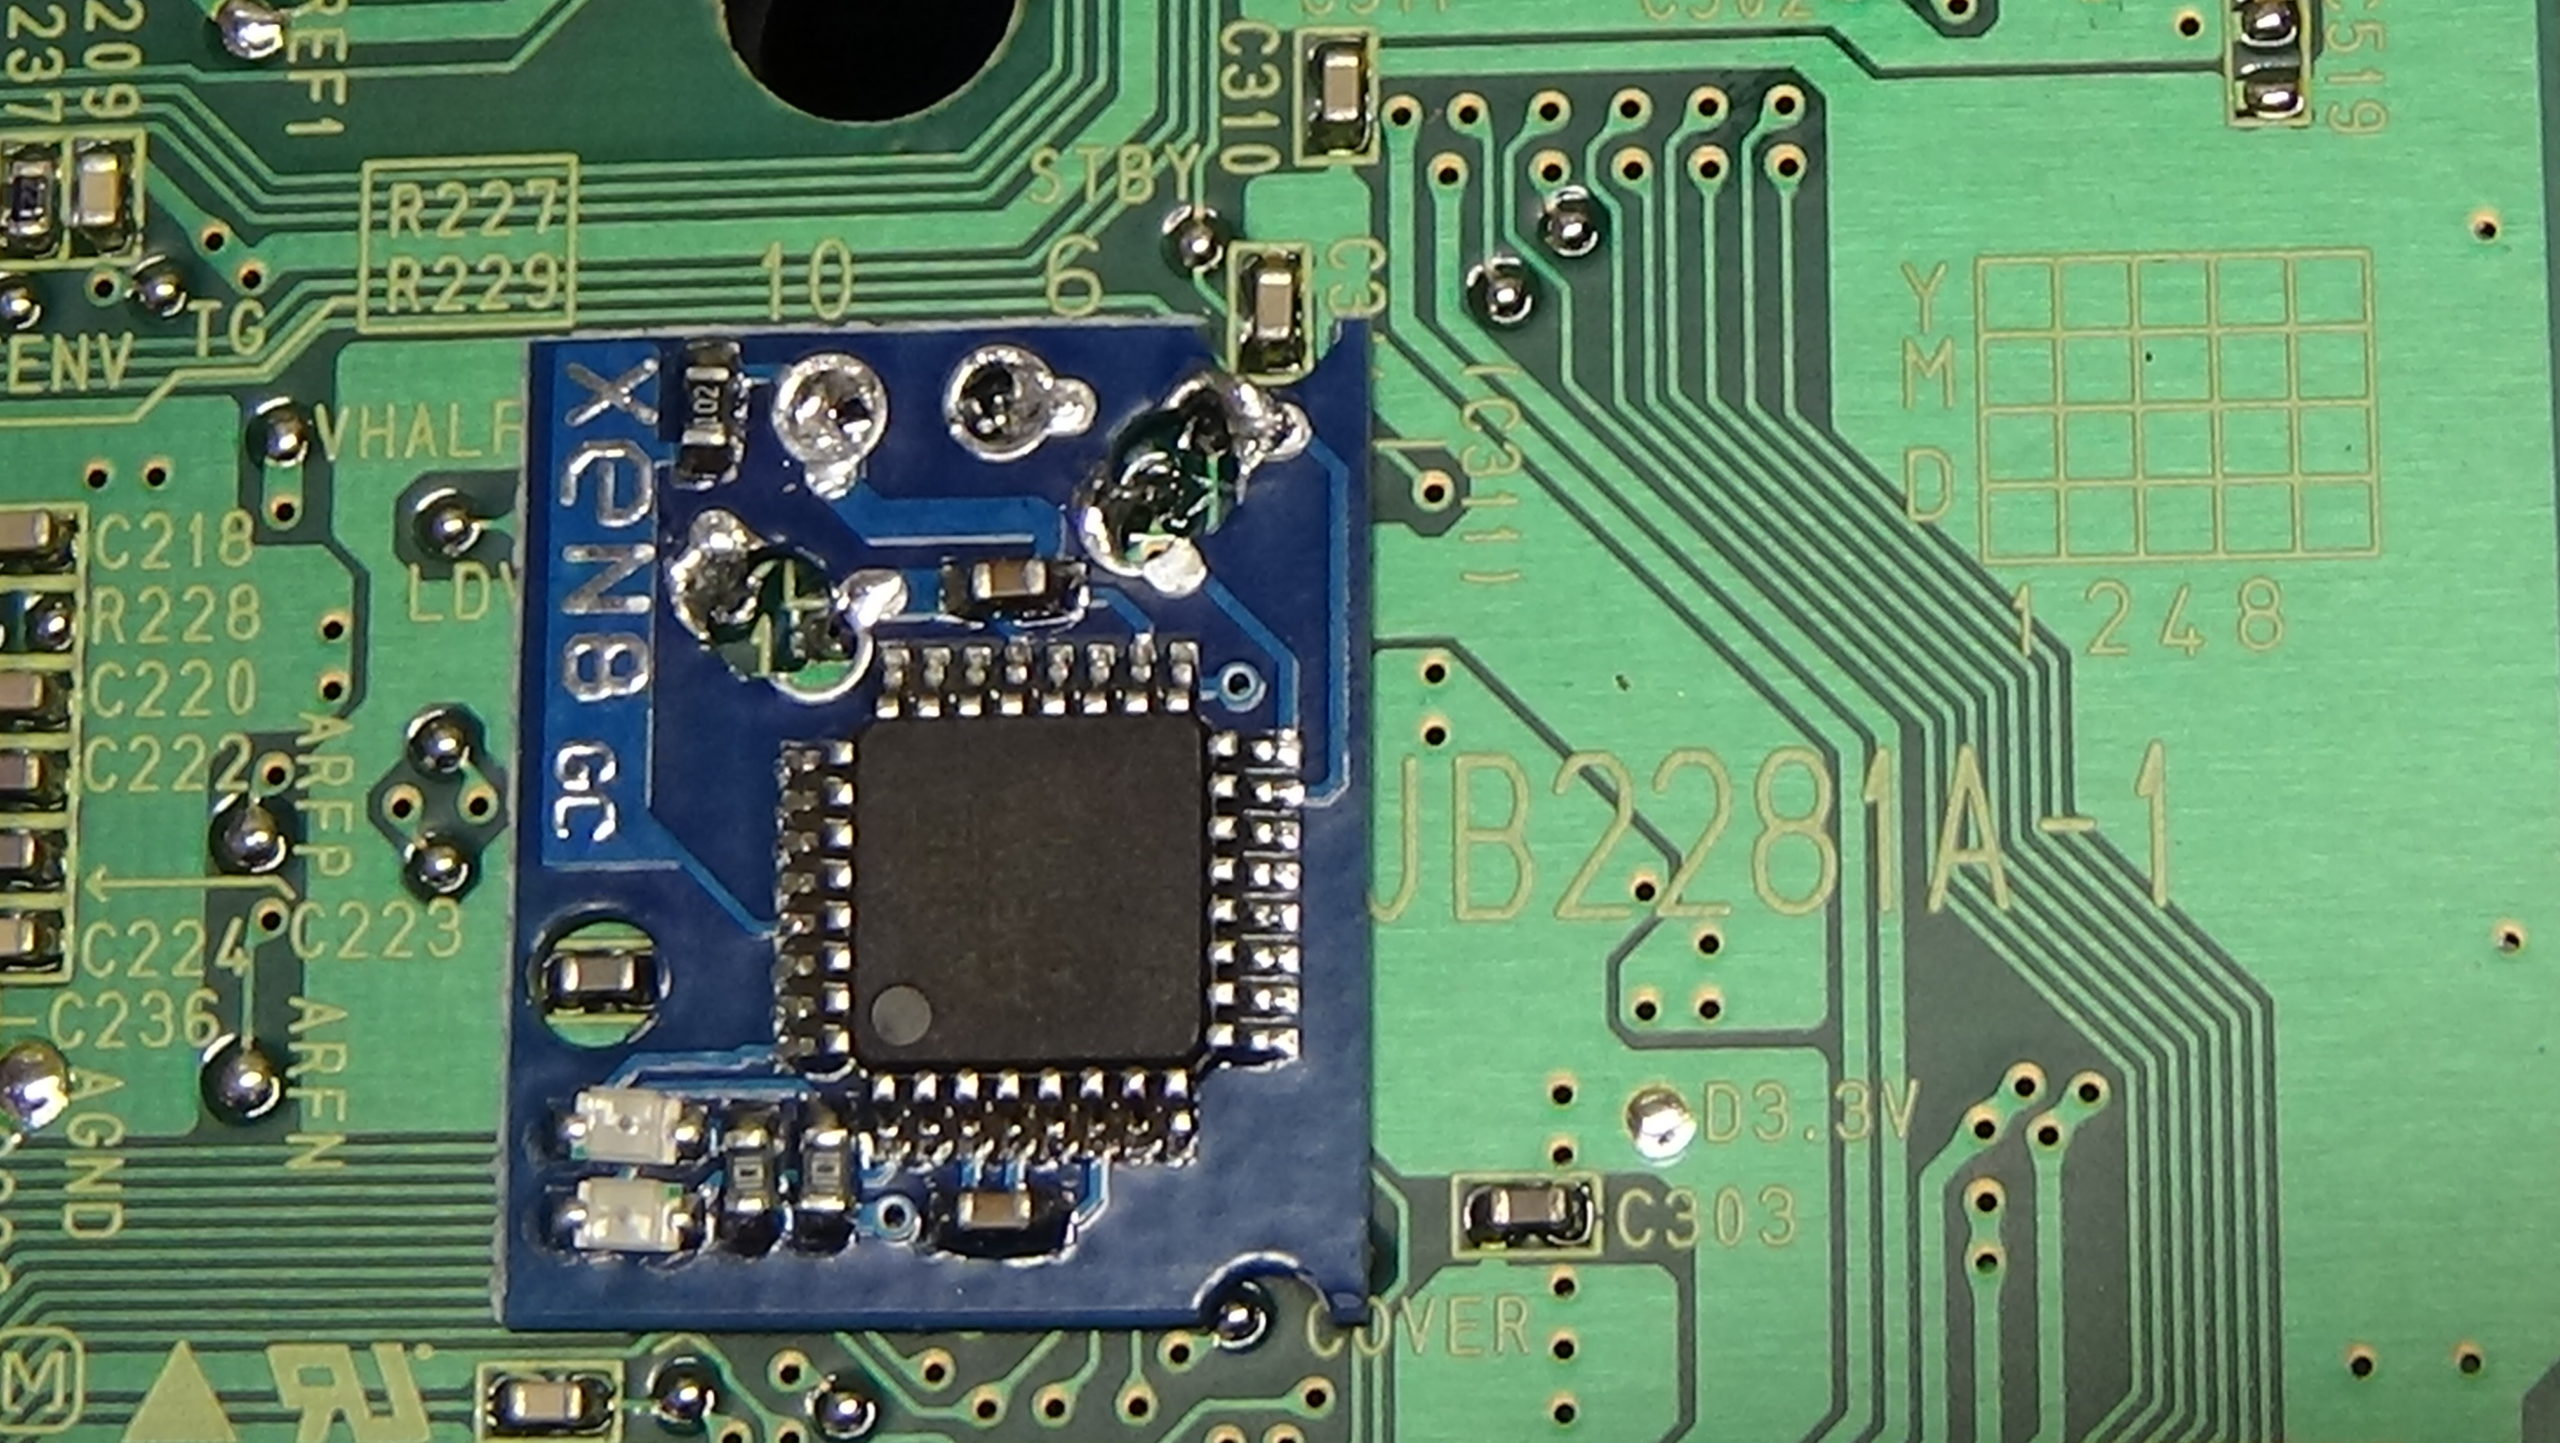
Xeno GC Solder points


This is a really easy install - all that is required is to simply place the chip over the requisite points and add solder. Be careful not to bridge the points as you will likely have to use hot air to remove the chip if you make a mistake. I recommend a piece of Kapton (or electrical) tape over the center area to be extra safe.
GameCube Pot Adjustment


You will often need to adjust the GC laser if you wish to play backups. This is due to the fact that burned media is much harder to read than commercial disks. There is a small potentiometer located on the top left corner of the board that can be used to adjust laser sensitivity. You can probe the legs of the pot using the continuity setting of a multi-meter while the GC is on. DOL-001 units are usually set somewhere between 450 - 600Ω while DOL-101 units will be a bit lower at around 150 - 250Ω.
You can use a small screwdriver to slowly adjust this pot to the left/right until you find a setting that will consistently boot burned media. Unfortunately, there is no specific number to shoot for since every Gamecube is different.